Step 1: Fitting the sliding track
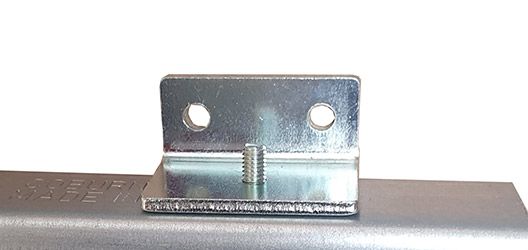
If the track is to be wall mounted you will need to screw the supplied wall brackets into the top of the track and then fix the brackets to the wall.
If the track is to be ceiling mounted then the wall brackets are not required. Simply screw straight up through the track and into the ceiling.
IMPORTANT: If your curtain is wider than 3m then your track will come in more than one piece that you fix in place end-to-end. You must make sure the ends line up exactly, if not the wheels will catch and it will hinder the performance of the curtain. If you have the choice of ceiling mounting or wall mounting the track, then ceiling mounting is always the preferred option because the ceiling (or box framework) will act as a straight edge and make the job a lot easier.
Step 2: Hanging the curtain
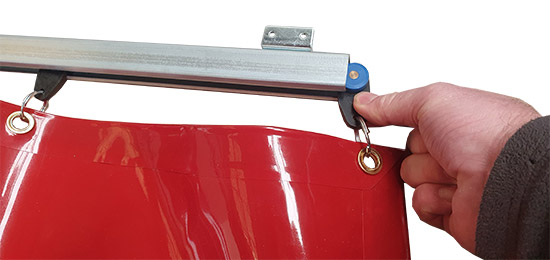
Once your track is securely fixed in place you can fix one of the supplied end-stops to one end of the track. Then start feeding the rollers into the other end of the track.
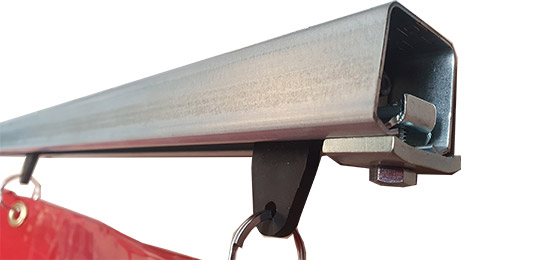
When all of the rollers have been fed into the sliding track you then need to fix the other end-stop in place to the open end of the track.
Once you have attached the other end-stop in place then the last job is to attached the supplied draw cord to the end roller and then your done.
That's all there is to it. If it's looked after correctly your new sliding curtain kit will last many trouble free years and can be cleaned very easily using water and a mild detergent.